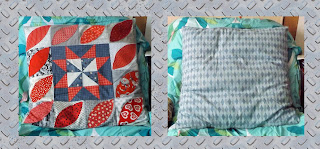
Stringing Quilt Blocks
Stringing 2 Quilt Blocks

Stringing quilt blocks isn't as hard as one may think it is to do.
(You can click on the photos to enlarge them and to reduce them back to their original size or hit return if that doesn't work for you to down-size them)
First of all, is the preparation, cutting the pieces of fabric up...
I'm working with Half Square Triangles (HST) for making each of these two 12.5 inch quilt blocks. I'm using two different methods to make the pink quilt block up. I'll be working with both 4" and 8" fabric squares to do same.
For the one with the PINK print: I'll be using four 4" squares of pink fabric and four 4" squares of white fabric. Plus one piece of white fabric 8" square and one piece of black fabric 8" square. From these, I'm going to end up with 16 HST's 3.5" square.
For the one with the YELLOW fabric, I'll be working with one piece of yellow fabric 8" square, one piece of black fabric 8" square and two pieces of white fabric 8" square. From these, I'm also going to end up with 16 HST's 3.5" square.
I am going to draw a diagonal line across each of the pink 4" pieces of fabric, from corner to corner. Then, I'm going to clip the 4 white pieces of fabric behind the 4 pieces of pink fabric.
On the yellow 9" piece of fabric, I am going to draw an X on it, from corners to corners. Then, I'm going to back it with an 8" white piece of fabric and clip it together.
Next, I'll draw an X on both pieces of the black fabric, also from corner to corner. Plus back each one of them with a white piece of fabric and clip them together.

I used Pastel Chalk Pencils to draw my X's on the black fabric.
The Sewing Machine Settings

I'm working with a Brother CL6000i Sewing Machine with the J foot on it. When turning the machine on, the sewing machine needle is always in the center position. I moved the needle all the way over to the right side by setting the machine on stitch number 00 which shows up as the two large 00's on the left side of the screen. The needle was all the way on the left side at this point. I moved the needle all the way to the right side by clicking on the needle position button, which changed it from 00 to 70, which I use for making 1/4" seams. That's the bottom button on the right side.
Now, we are ready to start Stringing Along.
The pink fabric has been prepared for same. It's a 4" square that has a diagonal line drawn from corner to corner and has a white piece of fabric clipped underneath it.

Line up the sewing machine foot and the fabric by placing the pink square near the tip of the fabric, on the left side of the drawn line on the fabric. Now, you are ready to start stringing away.

After running the first piece through, take the second piece and put the tip of that triangle piece directly behind the first one, just about touching it. You will have to use your foot lever to do that. Line it up the same as you the first piece. Do the same with the third and fourth pieces. BUT, when about half way through the fourth piece, STOP SEWING. Use either your scissors or your clipper and gently cut the thread in front of the fourth piece, separating it from the first 3 pieces.


When you flip all of your blocks over, they should look like this. You will have 3 white pieces of fabric 8" square and 4 pieces of white fabric 4" square.
Now, off to the cutting board - First, the pink fabric squares

Now, we have to cut up the pieces to continue to making the two quilt blocks, the pink one and the yellow one. Here. I'm using a 6.5 inch quilt ruler and an 8 inch cutting mat along with a rotary cutter. You can use whatever you have on hand and whatever brand you like. Really doesn't make a difference, as long as it gets the job done. Put your quilt ruler on the drawn diagonal line on the pink fabric.

Cut away. Do that to all of the 4 pink 4 inch squares.
Trimming the fabric squares to size

Take a good look at your quilting ruler. Most quilting rulers have 3 diagonal lines on them, 30 degrees, 45 degrees and a 60 degrees lines. We will be using the 45 degrees line when cutting up the HST's. This line you will lay across the center diagonal seam to center the HST piece of square fabric. This is an important step for having your points come out perfect or almost perfect.

Now that we have the 4 inch fabric pieces cut in half we will be checking and cutting the squares down to size. The desired size we want for making up these 2 blocks is 3.5 inches for our HST's. Most rulers have 1/2 inches marked off on half of the square rulers. This one has it highlighted in orange, so, when making up HST's 1.5", 2.5", 3.5", 4.5", 5.5" and 6.5" I use this side of the ruler for making them up. Same as you would do if just making up plain blocks that aren't HST's.
Seeing that we are using 3.5" HST's line up the ruler for same on the 3" marking when using this orange side of the ruler that has the 1/2" intervals, which will give me my measurements for the 3.5" HST's that I'm working with now. . When working with full numbers such as 2, 3, 4, 5, and 6 I use the other half /side of the ruler, without the orange tint to it.

I like to cut off one of the dog ears first, at the point that will be under the ruler. You can do that corner either before or after wards. Your choice of which way you prefer to do it. With your Rotary, trim one side of the fabric square to size if need be then turn or spin your cutting mat to do the other side. The dog ears at this intersection will be cut off when doing your trimming of same.


Next, Time to cut up the yellow fabric squares and the black fabric squares...

We will be doing these differently than the pink fabric squares. Because they are 8" long, we have to change over to a longer ruler and a larger cutting board. It is very, very helpful if the ruler is at least 4" wide. Using a 14" square cutting board here. This is the one used for checking the size of the final square, to see how close we came to the 12.5" block size.
We are going to end up with 8 HST's, 3.5" in size, from this 8" yellow square. Remember, there is a layer of white fabric beneath the yellow fabric.

First, we cut the 8" fabric square in half lengthwise.

Then, we are going to cut the two 8" long X 4" wide fabric in half, vertically, thus, giving us four 4" squares...


We'll proceed to cut these 4 square 4" into 8 pieces by cutting them in half, using our drawn lines, same way that we cut up our pink 4" squares. Here's 2 of them cut up.


Here we go again... I dragged out my smaller 6.5" ruler and my 8" cutting board for this step.


Trim the HST down to the desired size of 3.5"

Double check each one of the yellow HST's for their size.


Now, refer to your instruction chart for joining the pieces together. With the black and white pieces we are going to make our points for the 2 Whirlpool Blocks by sewing two of them together. The assorted clips are different colored see through clips. You can actually see your seams through them. I used them for matching up my points, at both ends of the black and white HST's before sewing them together.

Do the same with the pink and yellow squares. Then, chain them. Your 32 blocks should end being total of 16 squares when 2 are sewn/chained together. The chain starts at the red clip and ends up at the blue clip. Refer to your instruction sheet for your layout of same. I'm making up the Whirlpool Block with mine.

A close-up of joining 4 pieces together...


Close -Up

Getting ready to be chained one more time...

Here we go, forming another chain. From the front side of the sewing machine...

Another view from above the sewing machine of the chain...


And a view from the back of the sewing machine.

We now have 4 units made up to form the Whirlpool Block. I opened them up and looked at them and checked their size, 6.5" for each of the 4 units.

I double checked my instruction sheet this time...

If you don't double check, you might end up with one like this one as what happened to me when trying to rush to get the block made up in a hurry and a little bit on the tired side. I ended up with 2 of them made up that way when making 2 up of them at the same time... LOL...

BE AWARE... PAY ATTENTION TO YOUR INSTRUCTION SHEET WHEN ASSEMBLING THE BLOCKS at all times when making the blocks up....


Ironing the assembled blocks off

When done, give them their last ironing and check the directions that their seams are going/nesting...

- Pay attention to the center of the quilt block. Nest it.


An alternative is to clip them, as you might have to do on other seams when nesting them on the back of the block.

Clipping has to be done very gently, as not to go past the seams. Like only about 1/8 of an inch on your 1/4 inch seams when doing same...

The yellow block completed...

The pink block completed.

The two blocks, side by side.

Well done!😁😍
ReplyDeleteThank you. Hope it helps someone out. Was fun making them up. Counting my 2 goof ups, I made up 14 of these blocks. The 12 of them were for BOM swaps. The 2 goof ups I put in a Side Swap...LOL...
Delete